![[RSS]](../theme/image/rss.png)
Zur Erinnerung an Erich Mühsam, ermordet vor 90 Jahren
Gestern fand in Heidelberg ein Erinnerungsabend an Erich Mühsam unter dem Titel Sich fügen heißt lügen statt. Der Anlass war nicht im eigentlichen Sinn erfreulich: Auf den Tag genau 90 Jahre zuvor hatten SS-Männer den „Dichter für Freiheit und Menschlichkeit” (und anarchistischen Aktivisten) im frühen KZ Oranienburg – zu diesen Einrichtungen siehe auch Auftakt des Terrors – ermordet.
Ich finde (eingestandenermaßen unbescheiden), es war trotzdem ein schöner und informativer Abend mit Texten, Gedichten und Liedern von Mühsam, der ihm wahrscheinlich selbst gut gefallen hätte. Mir hat er auch deshalb gefallen, weil mir Mühsams Denken und Handeln in vielerlei Hinsicht sehr modern erscheint – ebenso in der Ablehnung autoritärer Verwirrung in der Linken wie in der entschlossenen Bereitschaft, trotz solcher Grundhaltungen mit Menschen guten Willens an guten Zwecken – wozu insbesondere der Kampf gegen grosso modo Militär und Polizei gehört – zu arbeiten, ganz im Sinne der „ökumenischen Linken“, für die ich David Rovics vor drei Jahren gelobt habe.
Ich selbst habe vor allem beigetragen durch Lesungen von Extrakten aus zwei Gebrauchstexten von Mühsam. Und nachdem ich die schon mal produziert habe, dachte ich mir, ich könnte sie ja auch hier veröffentlichen, zumal mir scheint, dass zumindest im offenen Netz nirgends brauchbar ocrte Volltexte von ihnen stehen.
Strafvollzug in Bayern
Der erste Text war eine Rede, die Mühsam 1925 vor der ersten Reichstagung der „Roten Hilfe Deutschlands“ gehalten hat. Der Text passte auch, weil die Veranstaltung gestern von der modernen Roten Hilfe veranstaltet wurde, und zwar im Rahmen von deren Hundertjahrfeiern, die hier schon zuvor Thema waren.
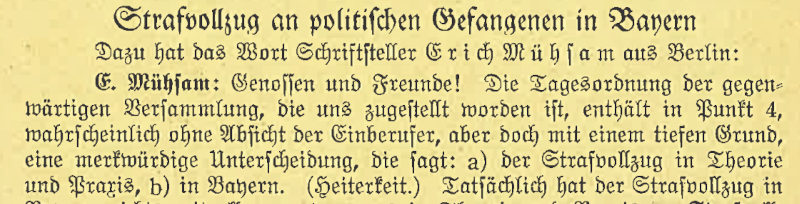
Mühsam war gerade kurz zuvor aus einem bayrischen Knast rausgekommen, in den ihn die Behörden von Weimar wegen seiner Unterstützung der bayrischen Räterepublik von 1919 hatten stecken lassen. Der Volltext der Rede (als PDF ohne Text) ist in Fraktur gesetzt; was an daraus resultierenden OCR-Fehlern noch übrig ist, bitte ich großzügig zu überlesen. Kursiv ist im Folgenden meine Moderation.
Erich Mühsam hat 1925 auf der ersten Reichstagung der Roten Hilfe ein Referat gehalten, das zumindest im Inhalt sehr aktuell klingt, jedenfalls für Menschen, die mal in Bayern demonstrieren waren.
Genossen und Freunde! Die Tagesordnung der gegenwärtigen Versammlung, die uns zugestellt worden ist, enthält in Punkt 4, wahrscheinlich ohne Absicht der Einberufer, aber doch mit einem tiefen Grund, eine merkwürdige Unterscheidung, die sagt:
- der Strafvollzug in Theorie und Praxis,
- in Bayern.
Vieles von dem, was Mühsam im Folgenden berichtet, ist aus heutiger Sicht ein bitterer Kommentar zu all den bürgerlichen Theorien [im Blog: Exhibit 1, Exhibit 2] wie es dazu kommen konnte, dass die Deutschen praktisch ihn ihrer Gesamtheit zu FaschistInnen wurden. Wer Mühsam liest, wird sich noch mehr als ohnehin schon fragen, woher wohl das Gerede von den "Extremisten von Links und Rechts" kommt, die den blühenden Rechtsstaat Weimar demontiert hätten.
Nein, es ist eher ein Wunder, warum ein derart von rechtsradikalen Autoritären durchsetzter Apparat so lange gebraucht hat, um auch formal die Macht an eine Partei wied ie NSDAP übergehen zu lassen. Hören wir weiter Mühsam:
Ich muß mich darauf beschränken, vom Festungsstrafvollzug zu sprechen, weil ich hier aus persönlicher trüber Erfahrung sprechen kann. Was über den Strafvollzug in Zuchthäusern und Gefängnissen bekannt geworden ist aus Berichten, die mir zugingen von Leuten, die ihn selbst erlebt haben, die entweder auf die Festung zurückkamen oder mich später aufgesucht haben, das erweckt den Eindruck, als ob im Zuchthaus Straubing und in den Zuchthäusern Bayerns überhaupt gegen die politischen Gefangenen eine wahre Hölle etabliert ist und ein Verfahren, wonach die politischen Gefangenen schlimmer behandelt werden als die kriminellen, und zwar grundsätzlich.
Soweit wir erfahren konnten, wird z.B. Alois Lindner, der Erhard Auer verwundet hat, nachdem Arco Eisner ermordet hatte — und Lindners Tat war bekanntlich ehrlos, während Arcos Tat als die eines Ehrenmannes gefeiert wurde — so malträtiert, daß er zeitweilig seinen Aufenthalt in der Irrenabteilung des Zuchthauses nehmen mußte. Dagegen wird der Gefangene Makowski in einer Art behandelt, die ungefähr der Behandlung eines Hilfsbeamten gleichkommt.
Zur Einordnung: Eisner war Regierungsschef der Räterepublik, und Graf Arco hat diesen aus antikommunistischem Hass erschossen. Makowski wiederum hat als Teil der protofaschistischen Freikorps bei der Niederschlagung der Räterepublik 21 Männer niedergemetzelt, die noch nicht mal Kommunisten waren, sondern „katholische Gesellen“. Und so (wieder Mühsam) kam es,
daß das Gericht seine erste Aufgabe darin sah, festzustellen, ob die Mörder glauben konnten, Spartakisten vor sich zu haben, oder ob sie wußten, daß es sich tatsächlich um Katholiken handelte. Da man bei Makowski und Müller unbedingt zu dem Schluß kommen mußte, daß sie wußten, wer die Leute waren, bekamen sie hohe Zuchthausstrafen. Sie werden jetzt aber besonders bevorzugt behandelt. […]
Umgekehrt haben sich die Regierungen in Berlin und München besondere Mühe bei den Schikanen gegen die anderen Gefangenen, zumal solche mit linkem Hintergrund, gegeben:
Es ist in diesen Anstalten Grundsatz — ich bemerke, daß das allgemeiner Grundsatz in Bayern ist — daß die Bestimmungen, die den Verkehr mit den Angehörigen regeln, keine Gültigkeit haben auf Bräute. Die Bräute werden in Bayern nicht anerkannt, sie sind keine Verwandten, und selbst Bräute, die bereits Kinder von ihren Männern haben, und die nur aus irgendwelchen Gründen die Eheschließung nicht vollzogen haben, werden als Bräute nicht anerkannt.
Auf der anderen Seite haben wir, wenn wirklich mal von der anderen Seite einer ins Zuchthaus kommt, den Fall Zwengauer. Zwengauer ist eines Fehmemordes überführt worden. Er wurde zum Tode verurteilt und dann zu lebenslänglichem Zuchthaus begnadigt. Er konnte aber nach ganz kurzer Zeit, nach wenigen Wochen aus der Krankenabteilung des Zuchthauses flüchten. In der bayerischen Presse hieß es: „Es hat den Anschein, als ob er mit Hilfe von Strafvollzugsorganen geflüchtet sei.“ Den Anschein hatte es für uns allerdings auch.
Von Links her ist in Bayern einem politischen Gefangenen die Flucht noch nie gelungen. Selbst die Flucht aus Festungen ist seit Januar 1921, wo es einem meiner Freunde auf dem Transport zum Zahnarzt gelang, aus dem Zuge zu springen, nicht mehr gelungen. Es wurde keiner mehr zum Zahnarzt befördert.
Mühsam kommt jetzt genauer auf seine „Festungshaft“ zu sprechen. Festungshaft war im Kaiserreich eine Art Hausarrest für Ehrenmänner – etwa welche, die sich duelliert hatten – unter einem weit großzügigerem Regime als in Gefängnis oder gar Zuchthaus. Für die linken politischen Gefangenen der Weimarer Republik änderte sich das recht schnell:
Als wir verurteilt wurden vom Stand- oder Volksgericht, da waren die Urteile, die mehr durch Glücksfall auf Festung lauteten, selbstverständlich ausgesprochen worden in der Voraussetzung, daß nunmehr auch Festungshaft vollstreckt werden würde. Bei denjenigen, gegen die man Zuchthaus wollte, wurde ausdrücklich gesagt, daß man keine Festung haben wolle, und das Strafmaß für uns andere wurde außerordentlich hoch angelegt mit Rücksicht darauf, daß die Strafe leicht zu ertragen sei. Unter dieser Voraussetzung wurden bis 15 Jahre Festung verhängt.
Da kam der Justizminister Dr. Müller (Meiningen), Demokrat in der sozialdemokratischen Regierung Hoffmann, und brachte, nachdem wir schon von Anfang an nicht in die eigentliche Festung, die dafür gedient hatte, gelegt wurden, sondern in eine Abteilung des Zuchthauses Ebracht, also in andere Räume, und nachdem uns schon von Anfang an Ausgang nicht bewilligt wurde, obwohl er zur Festungshaft gehört, nachdem uns sonst aber ein Festungsstrafvollzug, wie er üblich war, zuteil geworden war — war im August 1919 einen Erlaß heraus, den er Ausführungsbeftimmungen zur Hausordnung für Festungsgefangene nannte. Diese Ausführungsbestimmungen hoben aber die Verordnung, deren Ausführung sie auslegen sollte, absolut auf. […]
[Die bayrische Regierung kann danach] jeden Raum, der [ihnen] gefällt, dazu bestimmen. Klar ist, daß das Gesetz für die Festungsgefangenen bestimmt, daß sie in eigens dazu bestimmten, baulich dafür in Frage kommenden Räumen unterzubringen sind und nicht in Räumen, die zu Gefängnis- und Zuchthausstrafen eingerichtet sind.
Das kennen wir auch heute noch, von Sicherungsverwahrung – neulich war Thomas Mayer-Falk hier in Heidelberg – und auch von Abschiebehaft und ähnlichen Übergriffen.
Ich bin darauf eingegangen, weil von hier aus die ganzen Schikanen, die ganzen Ruchlosigkeiten ihren Ausgang nahmen. Denn nicht nur, daß wir in Gefängnissen und Zuchthäusern untergebracht waren, wir wurden auch bewacht von ausgebildetem Gefängnis- und Zuchthauspersonal, die den Unterschied zwischen der Festungshaft und der Gefängnis- und Zuchthaushaft nicht machten. So geschah es und so war es auch die Absicht.
[…]
Es ist ein uraltes Prinzip des Strafvollzugs, daß bei Beginn der Strafe die Strafe schwer ist, daß die Gefangenen zuerst fest an die Kandare genommen werden und daß allmählich ein Nachlassen dieser Härten vor sich geht. Das ist ein Prinzip, wie es bisher überall im Strafvollzug festgelegt ist. In Bayern wurde das umgekehrte Prinzip gehandhabt. Es hat sich in einem Prozeß durch den Eid eines Beamten der Festung St. Georgen herausgestellt, daß ein Erlaß bestand, wonach Müller (Meiningen) verfügt hat: Die Festungshaft ist sukzessive zu verschärfen. Und die Verschärfung hat fünf Jahre angedauert.
Franz Kafkas „Prozess“, geschrieben ca. 1914, erschien gerade in den Tagen, als Mühsam seine Rede hielt. Es war Zeitgeist:
Die Verschärfungen wurden zur Kenntnis gebracht häufig einfach durch Disziplinierungen. Man wurde in Einzelhaft genommen und wußte dann, daß man das und das nicht tun darf. Fünf Jahre wurden wir so gemartert. Das war schlimmer, als alles das, was ich später nur streifen kann, da ich wenig Zeit habe. Ueberhaupt diese geheimen …